Search A n R

Showing posts with label recipe. Show all posts

Sunday, February 26, 2012

Kandhi podi / Paruppu Podi ~ with almonds ~ Vegan and gluten free

Lunch menu definitely has atleast one thuvayal and/or a podi. They not only are a great way to induce protein into your diet but ingredients in them help in improving digestion, increase our intake of dals and much needed fiber. On a busy day, I do not mind finishing my lunch with a bowl of rice or broken wheat with a thuvayal and podi.

The twist
Kandhi podi or paruppu podi is a staple in most telugu and tamil homes. Among the variations I make, almond-paruppu combo is one of them. Whats also good about adding almonds is that oil from the almonds lends a distinct flavour and rules out the need for oil or ghee when mixed with rice.

You need: makes 3 cups
Tur / Tuvar dal / Kandhi pappu / tuvaram paruppu - 2 1/2 cups
almonds- 1/2 cup
Red chilies - 7-8 (i prefer medium to low spice)
salt- to taste
asafoetida - 3/4 tsp
peppercorns - 1 1/2 Tbsp
Sugar or jaggery - 1 Tbsp (optional)


Process:

  • Roast almonds til their skin starts to turn a little darker brown. (Do not over roast as burnt or excessively roasted almonds taste bitter)
  • set aside to cool
  • In the same pan, dry roast dal until it turns a little reddish and you get the aroma of tuvar. 
  • Transfer to same plate you set aside your almonds
  • Roast red chillies and peppercorns together (this may take 1 -2 minutes, not more)
  • When all the ingredients are cool to touch, Fine grind them with salt and asafoetida
  • Cool and transfer to an airtight container. If needed, refrigerate the podi (if made in larger quantities, and during summer - just to ensure that oils from almond do not spoil)


Serving suggestions: 

  • With Rice 
  • Stuffing for paratas
  • Garnish for pasta (yes, you read it right, pasta), salads, and regular stir fried vegetables. 

Saturday, February 18, 2012

Whole Wheat, cornmeal and raisin ~ Vegan bread

I have not been posting bread recipes of late. This time around I wanted to try using the bread flour (I avoid using refined flour in general).

This experiment was to see if bread flour would make any difference in density and texture of the loaf. 100% whole wheat baking at home results in a slightly denser loaf. I avoid gluten in the flour and gluten helps in making the bread fluffier. I do not eat store bought baked goods so its difficult for me to assess the difference in home made and store ones. 


You need: 1 regular loaf
Bread flour - 1 1/2 cup
Whole wheat (king arthur or similar) - 1 cup
corn meal - 3 tbsp
Active dry yeast - 2 1/2 tsp
Water - 1 3/4 cup (Warm) (includes 1/2 cup for activating yeast)
Raw / unrefined / Turbinado sugar - 2 tbsp
maple syrup or honey - 1 tbsp
salt - 1/4 tsp
Raisins - 4 tsp or 1/4 cup
Rolled (cooking ) oats - 2 tsp (to sprinkle on top) (optional)
Olive oil - 1 1/2 tsp
Indian Garam masala - 1/2 tsp (optional)
Bread loaf tin - 1


Procedure:
Flour mix - Mix in the bread flour, whole wheat, corn meal, sugar, salt, garam masala and raisins
Divide the oil and pour in 1 tsp into the flour mix
Use 1/2 cup lukewarm water and mix honey or maple syrup
Add yeast and leave it to froth for ten minutes
Pour in the activated yeast and fold in the flour mix. Keep adding the rest of the water in small quantities and knead the dough to a (roti or a pizza dough consistency)
Let it rest for five minutes and knead it gently (This is to activate the gluten in the bread flour)
Grease the loaf pan and dust it with a little flour and transfer the well kneaded dough
Let it rise for 3 to 3 1/2 hours
Bake at 375 F for 40 minutes
Let it cool. Slice and serve with some fruit butter or jam. it yummy as is !


yummily sliced by DH :)

Serving suggestions: with pasta, salads or soup, great with mixed veg gravy sabzi


Trivia

  • Bread flour is a mix of regular refined wheat flour (maida) and is enriched with bromine and  barley
  • I intend to make whole wheat bread with out the bread flour 
  • This experiment was to prove to dear hubby that the store bought 100%whole wheat is not entirely whole wheat but had only 1/3or a little more of whole grain flour and the rest is refined flour.


Wednesday, February 8, 2012

Beetroot leaves and Moong Dal ~ Cooked in spicy coconut puree / sauce

Up for some green! (reds to be precise :-). Beet leaves in various forms are a regular feature at home...yum! So here is another simple, low fat, and very nutritious recipe.


You need: serves 2
Beet Leaves - 1 bunch
Moong Dal - 3/4 to 1 cup
Salt to taste
Turmeric - two pinches
Hing / asafoetida - a pinch or a little more
Kuzhambu or rasam powder - 1 1/2 tsp (you could use less)

For the coconut puree
Coconut - 1/2 cup (shredded)
cumin seeds - 1/2 tsp
green chillies - 2
curry leaves - 4
pepper corns- 4 or 5
water - just enough to grind

Tempering
Mustard seeds - 1/2 tsp
Cumin seeds - 1/4 tsp
Red chilli - 1
Curry leaves - 3 or 4
olive /coconut / sunflower oil - 1/2 tsp


Procedure
Pre-soak moong dal atleast for 15 minutes
Drain the water out and keep the fluffed up dal aside
Wash beet leaves thoroughly and chop
Grind the puree ingredients together and keep aside
In a pan, start the tempering - add oil, mustard seeds, cumin, curry leaves, red chilli and asafoetida
When mustard crackles, add and lightly stir in moong dal (minus the water)
Cover and cook for a minute (medium flame)
Add the chopped leaves and stir well, cover and cook for a minute
Wait for the leaves to cook a little (they reduce in quantity)
add salt, turmeric powder and kuzhambu powder, saute well
add coconut puree and mix well...leave the pan covered until the leaves and the dal is well done :)
serve with rice or roti / bread


Trivia

  1. Beet cultivation dates back to second millennium B.C. 
  2. Beet leaves and beet are a great cardiovascular food! - great for your heart and in treating anemia
  3. Beet leaves and the root are extensively used for treating fever, constipation and blood related issues
  4. The entire beet plant (stem, leaves and root) contain oxalic acid - making it a highly recommended oxlate food to treat kidney stones and other renal issues
  5. There is a lot more...so dont discard those leaves - radish, turnip, carrots and every other root vegetable and their leaves are filled with nutrition :-) 

Two servings (two cups) of just this dish with a bowl of soup would make a great Brunch! Happy eating :)

Tuesday, January 31, 2012

Paarikkai / Pavvakka ulli theeyal ~ Tribute to my Palakkad roots

I generally dont click pics of regular/traditional dishes made at home. Wanted to change that this year and start documenting usual, day to day recipes as well (thanks to that special someone who pestered me to do so :)) Ulli (onion) and Parikkai (Bitter gourd) theeyal is a definite favourite of mine. (I am known for my love for bitter gourd :P). And as usual, this is a low fat recipe.

I decided to post this recipe to join a Kerala Kitchen event at Palakkad Chamayal :) This being my first such participation in the food blogging circle. I hope to have fun!!

Etymology:
Theeyal, a must have in most onam lunches (sadhya) literally means - burnt dish. This name is derived from the colour of the dish as we use well roasted coconut and tamarind.


This is exactly how its made in our kitchen.
You need: Serves 2-3
Water - 2 1/2 to 3 cups
Bitter gourd - 2-3 small /medium (de-seeded and diced)
Onion - 1 (diced)
coconut - shredded- 1/4 cup
curry leaves - 3 tsps (I use dried leaves)
Coconut (or til/ sunflower / olive) oil - 1 tsp

Flavoring / spices
Tamarind - two strips or a size of small lime / 3 tsps (if using paste)
Red chillies- 3
Turmeric powder - 2 pinches
Jeera / cumin- 1/2 tsp
Methi /fenugreek seeds - 1/2 or 1/4 tsp
pepper corns - 1/4 tsp
coriander seeds - 2 1/2 tbsp
Jaggery (optional) - 1 tsp


Use (Set aside) for Tempering
oil, mustard seeds (1/4tsp), a little cumin seeds, curry leaves, fenugreek seeds(optional), one red chilli

Procedure:
  • Soak Tamarind in a cup of water and microwave it for two minutes. 
  • Let it cool , add some water, mash the pulp to prepare two cups of tamarind water
  • Wash bitter gourd thoroughly and chop into small pieces; Soak them in salt water for ten minutes 
  • Chop onions and grate/shred coconut
  • In a pan, Dry roast coriander seeds, cumin, peppercorns, two red chillies, curry leaves, cumin seeds,  (with a little set aside for tempering) and coconut. you could add 1 tsp of onions (optional) 
  • Transfer well roasted ingredients onto a plate to cool
  • Grind the roasted ingredients into a smooth paste
  • In the same pan, pour a 1 tsp coconut or any oil of your choice
  • (you can avoid using oil because roasting of coconut leaves a thin film of oil in the pan)
  • Put in mustard seeds, cumin seeds, red chilli, curry leaves and saute for a minute
  • Add onions and saute for another minute before adding thoroughly washed bitter gourd 
  • Stir well and cover for a minute and pour in the tamarind water
  • Add salt, turmeric powder, and fine fine ground theeyal paste
  • cook until vegetables are all done and you get the yummy aroma of cooked theeyal


Serve with steamed rice, cracked wheat or roti/ bread of your choice


And off I go to join the fun at Palakkad Chamayal :)

Monday, January 30, 2012

Anniversary special ~ Vegan Lauki Chocolate Whole Wheat Quick Bread /cake

As mentioned in my earlier post about zucchini quick bread, I love veggies in cakes and breads. I use whole wheat King Arthur flour for my baking and love the wholesome and a slightly dense texture it lends to my cakes and loaves.
You need: for 1 small loaf
whole wheat flour - 1 cup
Bottle gourd - (grated) - 1 cup
Olive oil /sunflower oil - 1/3 cup
vanilla essence - 1/2 tsp ( upto 1 tsp is fine)
Cane Sugar - 1 cup (if using light brown sugar - 3/4 cup)
baking powder- 1/2 tsp
baking soda - 3/4 - 1 tsp
milk  or warm water - 3/4 cup
raisins - 1/4 cup (optional)
unsweetened chocolate powder - 3 tbsp

Procedure:
Mix in all the ingredients, grease a loaf pan
pour in the mixture and bake at 365 F for 35-40 minutes in the middle rack
Do the fork / tooth pick test and if it comes out clear take the pan out
cool for an hour before trying to take the loaf out of the pan
Serve with vanilla ice cream or as is!!

Friday, January 27, 2012

Oven roasted Arbi / cheppankazhangu / Taro root / chama dhumpa

I never get to click pics of this dish. Reason being, my DH who cant resist eating them right out of the oven. Traditionally, taro root or colocasia fry is a popular dish in south indian cuisines. As much as I love it, i cant get myself to deep frying anything. So here is my equally yummy oven roasted version.


You need: Serves 3 or 4  (in our case- 2)
arbi/ Taro root - 12 small /medium (root chunks)
Water - just enough to pressure cook them
salt - to taste
turmeric powder - 2-3 pinches
hing /asafoetida - 2 pinches
curry leaves - a string (5-6)
lemon rind or tamarind - 1 small strip (for use while pressure cooking the root)
Kuzhambu powder - 3 tsps or less
oil (olive or sunflower) - 2 - 3 tsps
water - 1 tbsp to sprinkle

Wednesday, January 18, 2012

Guest Post ~ Saravana's wood apple chutney


My Soul bro is back :). I had featured Saravana's Arati poovu fry / vepudu earlier. And now he is back with a yummy chutney. I have fond memories associated with this chutney ..Amma made them when these fruits were in season...i also love the juice she made...all organic and naturally sweet!!!!:). 


Over to Saravana
------------
Wood Apple Chutney:  VELAGAPANDU CHUTNEY
Wood Apple, also called as Velaga Pandu (వెలగ పండు) in Telugu and Vilam Palam (விளாம் பழம்) in Tamil.   We know this fruit as it forms a part of ornamentation in vinayaka chavithi, to tie fruits for palavelli.
Both ripened and unripe wood apple is used in savories. For the current purpose, we use a ripened wood apple. Wood apple has a thick shell and has to be broken. A ripened wood apple can be spotted from long from its ripe, sweet and a woody smell.  Take a wood apple (200 gm), break it and scoop the inside paste from it.  Add 3 green chilies, sufficient salt and tamarind and blend the paste so that the ingredients mix well.
Place a pan on the stove and add 1 tsp of oil / ghee.  Add the wood apple paste in it and fry it with a lid covered for 5 min on a low flame.

Wednesday, January 11, 2012

Brinjal and potato podi poriyal

This is a very common and traditional brinjal dish. My DH likes this brinjal dish a lot among other variations. We can make this dish without the potato as well. I clicked pics of this dish so sharing it :)

You need: serves two
Brinjal -  1 large / 8 small - (Chopped 2 cups)
potato - optional - 1 large - (chopped 1 cup)
curry leaves - 4-5
cilantro / coriander leaves - for garnish

for the masala /podi
coriander leaves - 1 1/2 tbsp
peanuts- 1 tbsp
cumin/jeera - 1/2 tsp
garlic- 2 cloves (optional)
red chillies - 3
chana dal- 1 tsp
urad dal - 1 tsp
dry coconut /copra - 3 tsps
clove - 2 (optional)
elaichi / cardamom- 1 (optional)
dalchini / cinnamon - 1/2 " strip (optional)

Tempering
mustard - 1/4 tsp
jeera - 1/4 tsp
red chilli - 1
hing - a pinch
salt - to taste
cooking oil (sun flower / olive)- 1 tsp

Procedure
Masala / podi
Dry roast all the ingredients in a kadai / pan
let them cool and grind them into a coarse powder...keep aside
Veggies
wash and chop the veggies into 1" cubes or long 1/2" slits (the veggies need to hold up to being cooked and then being sauted with the podi)
microwave or steam the veggies separately until they are half done


The dish

  1. Pour oil into the kadai and add tempering ingredients - mustard (let them crackle) and then add dals cumin red chillies, curry leaves in that order and saute
  2. add the steamed potato cubes and saute for a minute, and then add bringjal 
  3. Add salt, turmeric powder, hing/asafoetida and stir lightly
  4. Sprinkle water (1 tbsp or so) and cover the kadai for a 2 minutes 
  5. when the veggies look almost done, add the podi ( 1 spoon at a time) and keep stirring lightly
  6. Once all the masala/ podi is mixed with the temered veggies, turn down the flame and simmer for a minute or so
  7. If you like the poriyal well done and crispy, transfer it to a baking tray and put it in the oven for 8-10 minutes at 350 on the top rack (include the preheat time as well)
  8. garnish with cilantro/coriander leaves and serve with roti varieties or rice and accompanied with khadi/moru kuzhambu, rasam and dal...yum!!!!


Trivia
Jeera rice and methi dal go very well on the menu with this dish :)..try and enjoy

This podi poriyal is very similar to vangi bath masala

Wednesday, December 7, 2011

Snake Gourd Perugu pacchadi (twist) ~ Thayir pacchadi ~ Yogurt Dip / dressing

I had posted snake gourd seed recipes earlier and am back with a small twist to the usual thayir pacchadi / perugu pacchadi. Snake gourd (including seeds) in curd- making a flavoured variety of curd/yogurt dressing or dip.

This perugu pacchadi is very simple and is a neat way to serve this veggie to people who dont like it :)

All you need - serves 2 or 3
Yogurt /curd /thayir -1 1/2 cup ( beaten)
Water - 2/3 tbsp
Snake gourd - 1 cup (chopped along with the seeds)
Green Chillie- 1 
Red Chillie - 1
Curry leaves - 3
Ginger - 1/2 tsp (optional)
salt- to taste
asafoetida (hing)- a pinch
Turmeric - a pinch

Tempering
mustard seeds - 1/4 tsp
urad dal - 1/2 tsp
chana dal - 1/2 tsp
jeera /cumin - 1/4 tsp
coriander seeds -1/2 tsp (optional)
 cooking oil (prefer til or sunflower oil) = 1/2 tsp

Garnish (optional)
ghee or til oil - 1/tsp
cumin - 1/4 tsp 
mustard seeds - 1/4tsp
urad dal - 1/4 tsp
chana dal - 1/4 tsp  

Topping
coriander/cilantro -1/2 tsp

What you do
Wash and chop the snake gourd use the seeds as well. 
In a pan, pour the oil for tempering and add the tempering ingredients (mustard seeds, urad dal, chana dal, cumin seeds, coriander seeds) in that order and roast for a minute or so.
Add curry leaves, red and green chillies, ginger and saute
Add snake gourd and the coconut, salt, turmeric, hing(asafoetida) and keep stirring until its done 
Let the mixture cool and then grind it into a smooth paste (add a little water if necessary)
In the meanwhile, prepare the curd - Add 3 tbsp of water to the beaten curd and add the ground mixture to the curd 
Now tempering - in the same pan, add ghee or til oil and put in a little mustard seeds, urad and chana dals, cumin and roast it until mustard crackles and the dals turn a golden brown 
Let it rest for a minute or so and then pour it over the prepared thayir pacchadi (never pour in anything hot into curd or butter milk- it curdles it up and separates the water content from the curd)
Garnish with cilantro/coriander leaves 


On the menu 
Chinna vengayum sAmbAr, Oven roasted Cheppankazhangu with the thayir pacchadi

Serving suggestion: With steamed rice or rice varieties (jeera rice, vegetable rice, pilaf/pulao etc), parata, and works wonderfully as a salad dressing.  :)

trivia:
Tamil kitchens make podalanga kootu and mooru kootu & telugu kitchens make pappu, and perugu pacchadi with the roasted version of this vegetable. My version of the perugu pacchadi is what i call an extension of the same genre but with a twist in presentation and use of the veggie

Wednesday, November 30, 2011

Guest Post ~ Saravana's Banana Flower Fry / Poriyal / vepudu

I met Saravana Kumar through a friend. In the few days of knowing him, I loved our common love for food and the will and interest..No..a strong need to experiment with ingredients. He is among those very few single men who can actually cook - really well! I need to mention his sense of humour and his meticulous (food experiments) documenting skills (I have been planning to do that for ever!!). I am so glad to have met another soul who has a holistic approach to food and cooking.

So over to Saravana.... :-)

Banana Flower Recipe
Banana Flower (Arati Puvvu in Telugu, Vazhai Poo in Tamil), which may also be called banana blossom, is used as a vegetable in India, especially in South India. It is known to have many medicinal values
Owing to its cumbersome process in cooking this flower, this recipe is not tied often. However, it is not so laborious process to cook this flower, if you have some practice. This flower is a classical example for acrid (vagaru in telugu,) taste.

Many cuisines add the sliced banana flower to meat stews, stir-fries, soups, and rice or noodle combinations. It is also used in cold salads, with the salad mixture presented to the diner in one of the large purple-red outer bracts.


How to peel the flower for use
I suggest coating the hands with cooking oil prior to working with it  
Banana flower consists of many layers of bracts or petals. Under the layer of each petal are a bunch of florets. Remove the hard pink petals and take out the florets found underneath. Once the tougher, darker outer bracts are pulled away, the paler and tender inner leaves are used in the recipe.

In each floret, you will find a string in the middle with a tiny head and also a small plastic like white cover around it. Both are not edible. Remove both from all the florets. The florets in the upper portion are slightly bigger than the florets in the inner portion. From the big floret, you can easily see these and remove it. But it is little difficult to find the string in the small florets. You have to open each small floret gently by your fingers and remove the string and cover. To do this, take a bunch of florets in one hand and hold the bottom and gently rub the top of the florets in your palm. Now the florets will open up and you will see the strings in each floret. Remove it. When you remove the hard layers, you will find the color of the bract will change from dark pink to a pale yellow and finally end up with a small white bulb The florets in the inner portion will be more tender. You can use the tender florets and the small white bulb as it is. No need to remove string or anything from these.

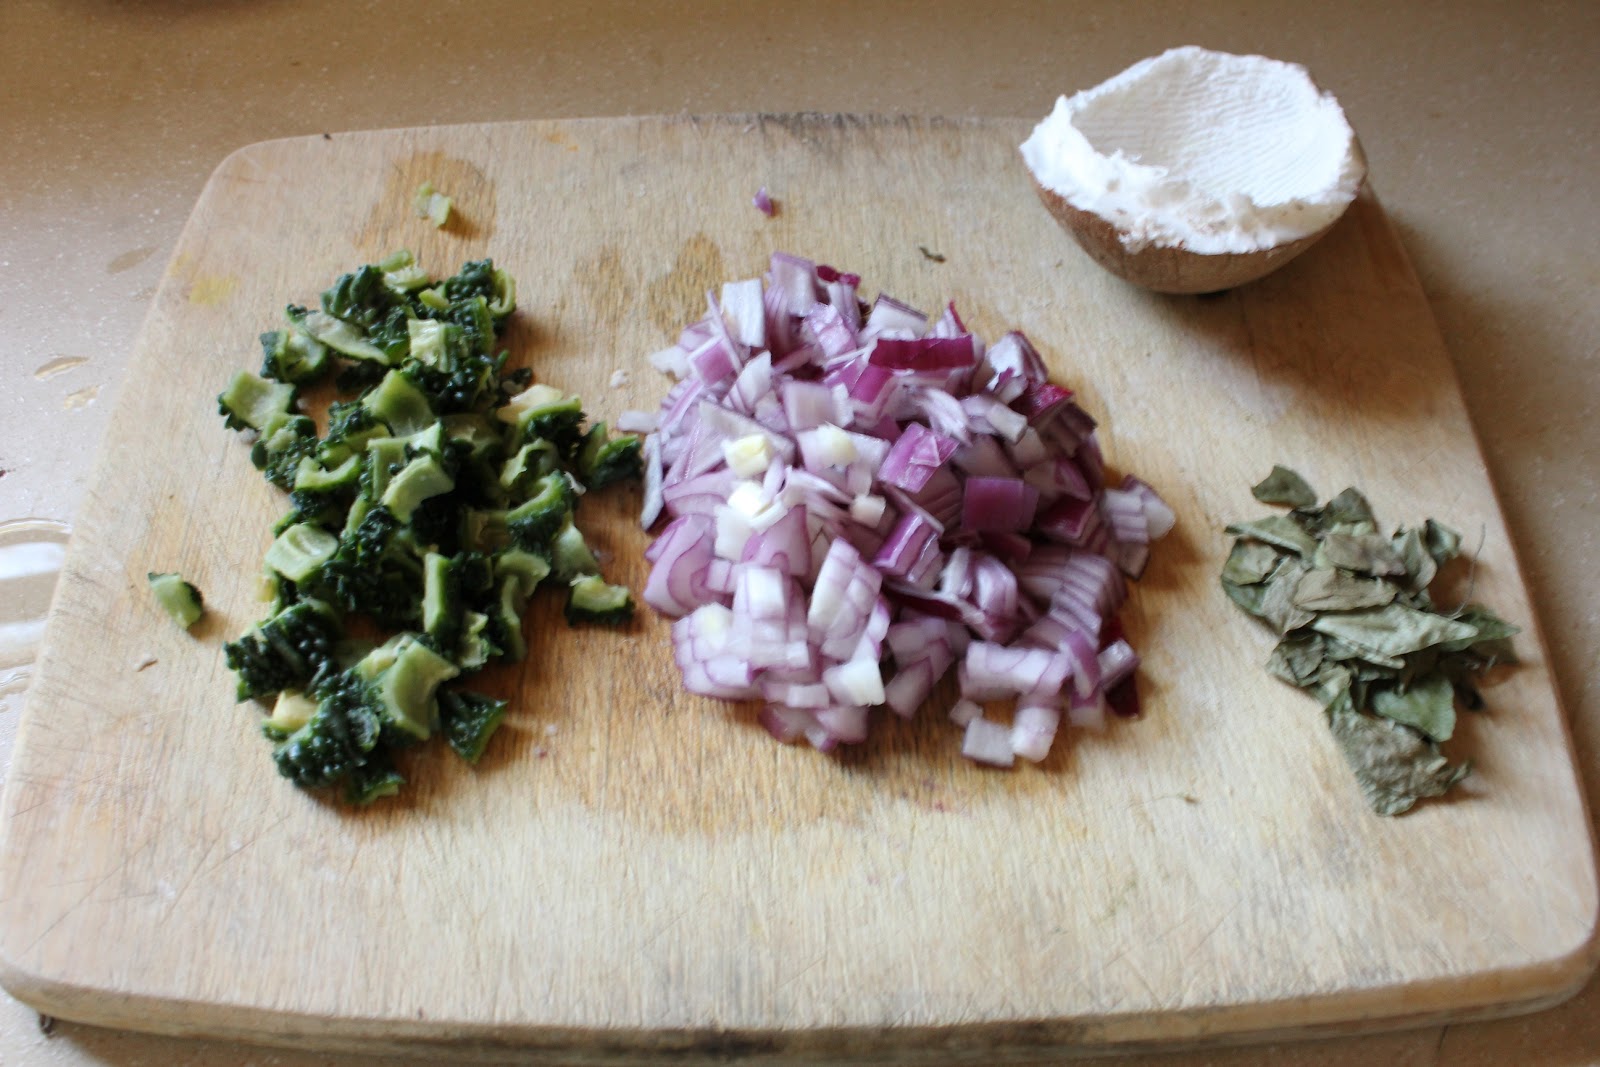
Then chop all the florets into tiny bits (you can whip them in a blender too) and put in water mixed with little butter milk till you cook the same. This will avoid discoloration of the florets.

And now for the Recipe
Ingredients
Banana Flower: 1 Large bulb / 500 grms 

Salt: to taste 
Spice:  Green Chillies - 3 small, slitted  
Tamarind Pulp / Paste - 2 tsps 
Buttermilk - just enough to soak the chopped florets

Tempering:
Asafoetida : 1 Pinch
Mustard Seeds: ½ spoon
Chana Dal – 1 spoon
Urad Dal  - 1 spoon
Curry Leaves -

Oil / Ghee  - 2-3 spoons 


The Recipe
Tempering:  Add oil in a wok or a pan. Add to it the usual spices, depending on your interest to make the curry as spicy as you like
Add Asafoetida, Mustard seeds, Bengal Gram and Black Gram and fry till they become brown. You can add sufficient amounts of green chilly slices, as per your requirement. Add the sliced florets to the above mixture and boil in a simmer. You can add a little water and boil the mixture till cooked, around 10 minutes on low flame.

Serving Suggestions
Serve hot, along with Rice or Rotis.  Accompaniments with this dish should be usually very tangy or spicy like pickles, chutneys or spicy salads which generally go well with acrid taste.

Other Dishes with Banana Flower:
Banana Flower in Curd - Perugu Pacchadi
Banana Flower Vadai
Banana Flower with Mango - a gravy 

Trivia
Banana Flower is used in many other cuisines, across many far eastern countries .


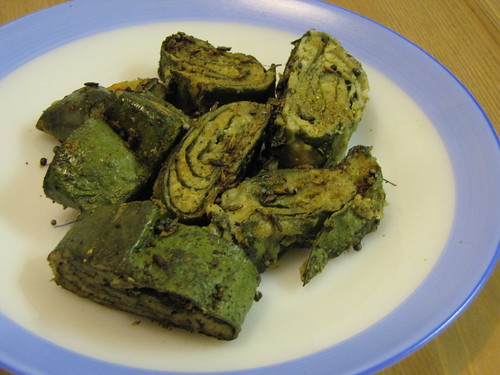
Actual lunch menu on the specific day: 
Rice (with urad dal called Mudganna) (center), with Banana Flower Curry (extreme right) along with Moong Dal (left) and Mango Ginger Chutney.


Served in Banana Petals


footnotes (courtesy wiki)
  • Banana flower is considered to be a good source of vitamins A and C. It is considered for its blood purifying qualities and is effective in curing Gynec disorders. It increases hemoglobin levels in the blood and is traditionally believed to be beneficial as a lactating agent.
  • The cut ends of the banana flower leak a sap that will stain skin and other surfaces black. The precaution of rubbing the hands with cooking oil makes cleanup easier. Exercise care while handling so that the flower does not stain your clothes.
  • Banana flower is also treated in several Asian and tropical cuisines as a vegetable. It is known in Japan as ‘Banana no tsubomi’, in Thailand as ‘dok kluai’, in Indonesia as ‘jantung pisang’, in China as ‘Shang chao fua’, in Sri Lanka as ‘kehel mal’. The words “banana flower” are variously translated as “banana blossom,” “banana heart,” or “plantain blossom.”
-----------
I appreciate Saravana Kumar to have taken time out to send me this wonderful write up.

Pics and content courtesy: Saravana Kumar

Tuesday, November 22, 2011

Snake gourd Seeds and amaranth leaves Thuvayal / masiyal

I generally shy away from sharing my off beat recipes but then thgt why not dare posting something this time :). It hurts when people who cant think out of the box tease me about my cooking. and even say "so what" or its no big deal..hmm what say when it is your own family and friends...hence the "keep it to myself" thgt of mine precedes my posts.. im just too much of a baby and cant handle such things i guess...

The thuvayal recipe is fairly simple with basic ingredients ~ tempering, and flavouring and the base ingredients...so here you go!

all you need
base ingredients
  1. snake gourd seeds - 1/2 cup
  2. amaranth leaves - 1 1/2 cup
  3. garlic - 1 clove (optional) (but would be good with just ginger as well!!)

condiments / flavouring 
  1. salt to taste
  2. tumeric powder- 1 pinch
  3. hing / asafoetida - 1 pinch
  4. Tamarind pulp - 2 tsp
  5. green chillies - 2 

tempering
corainder seeds - 1/2 tsp
cumin seeds - 1/4 tsp
mustard seeds - 1/4tsp
chana dal - 1/2tsp
moong dal - 1/2 tsp
urad dal - 1/2 tsp
oilve or sunflower oil - 1/2 tsp (according to your choice)
red chilli -1 (optional)
curry leaves - 5-7 (optional)

What you do :

  • Wash and chop Amarnath leaves and set aside to drip dry in a colander
  • peel garlic, and wash the snake gourd seeds and drain
  • In a pan or a kadahi pour olive oil and put in tempering ingredients - mustard, urad dal, chana dal, moong dal and red chilli and cumin and coriander seeds; Saute on medium flame
  • add garlic and the snake gourd seeds, curry leaves, green chillies and saute for another minute or until the seeds look translucent
  • add the leaves and saute for 2-3 minutes
  • add salt, turmeric powder, hing and cook for another minute or so (or until the mixture no longer has a raw smell but looks and smells yummy)
  • transfer to a plate and let the mixture cool
  • Grind (mixture and tamarind paste ) to a fine or a coarse paste (as per your choice for thuvayal / masiyal )
  • Serve with rice or roti...is a yummy alternative to regular thuvayals and a great way to include greens in ur diet


Snippets
Amaranth leaves - also called thota koora in telugu is a great source of fiber 
Amarnath seeds are a great source of gluten free is very good for people with coeliac dieases 
This paste /thuvayal can be used as a green sauce base for gravy curries 
mixed into roti dough, it makes great rotis as well (flavoured rotis or a diff variety of theplas maybe!!)
I have used this variation instead of pesto in pasta..i know ..i m crazy!!
a little (1 tbsp ) in the gravy makes a very creamy and healthy soup base as well...
you could add a little coriander leaves / cilantro and mint to make a perfect chutney for snacks (samosas and chats)- Believe me !!
So add this yum thuvayal in ur diet and have fun with food..a little thought into what you eat goes a long way :)

Monday, October 31, 2011

Diwali Special ~ Nutritious Mixed Dal ladoo ~ Kadhamba paruppu urundai

Diwali came and went by. I made some mixed dal ladoo. My hubby dear loves them. lol...he never refuses any ladoo variety I make..so I dont get surprised when 15 of them vanished in three days!!

I generally use most of the lentil/dals in varying combinations each time I make them. This time around..this is the combination


What you need
Moong dal - 2/3 cup
Masoor Dal - 2/3 cup
Urad Dal - 1/3 cup
Chana dal - 1/3 cup
light brown or Granulated sugar or jaggery- 1 1/4 cup ( or to suit your taste)
Elaichi powder - 1 tsp
melted unsalted Butter or ghee - 4 tbsp
raisins - 3 tbsp
Roasted almonds - 3 tbsp (split or coarsely crushed)

Process
1- Dry roast all the dals until you get a soothing aroma from them...take care when roasting. burnt dals will result in bitter tasting ladoos
2- spread roasted dals on a tray or a plate to cool
3- Grind them to the a stage where they are a combination of fine-coarse (a little finer than upma rawa /coarse sooji)
4- Pour into a mixing bowl and add sugar and elaichi powder
5- Saute curshed almonds and raisins in 2 tsps ghee and add them to the dal mix
6- Pour in the rest of the ghee and mix well until the ghee or melted butter is completely blended with the dal mix. (mixture should be moist and flaky)
7- Take a spoon full of the mix and start binding/rolling them

They ended up really yummy with this combo as well..Also made thattai and murukku to go with the ladoo


note: 

  • I melted 1 stick(4 oz) of unsalted butter
  • if using ghee make sure its a little warm helps in binding the ladoo better

Wednesday, September 21, 2011

Stuffed Capsicum ~~ anyone!!

dug out a very old folder and thgt id document my stuffed capsicum on AnR....

ingredients
1/4 cup each - grated potatoes, chopped  capsicum (i used yellow and green ones this time)
three whole capsicums
cumin, salt, turmeric, garlic crushed
2 tbsp mozarella
1 tsp olive oil

how its made: :)


use a pan to saute chopped veggies with some oilve oil & add salt, cumin, garlic and turmeric

In the meanwhile, rub some salt on the capsicum shells and microwave them for 2-3 minutes with two tbsp of water
Stuff the half done capsicum with the sauted mixture and arange in a baking dish and cover it with a foil
bake at 350 F/180C for 20 minutes 

take off the foil and top it with grated mozarella and bake it with out the foil until the cheese melts (roughly 3-5 minutes)

was great as is or with pulka or rice and dal


Thursday, September 8, 2011

Bharwa(n) Bhindi - Oven roasted and yummy!

Learnt it from a friend's mom and made them for the first time while in my Under-graduate program. I should say they turned out ok then, and my amma was impressed!!  Have been making them ever since...off and on before the wedding and then almost once a month for hubby dearest, a huge okra fan...so wouldnt he be the happiest! Flavour and texture of the batch I make has definitely improved over time.

You need

20 medium sized okra/bhindi
1 tbsp chopped coriander leaves/cilantro

tempering
2 cloves of garlic (crushed)
1tbsp olive or sunflower oil
1tbsp cumin seeds
1/4 tsp turmeric powder
1tbsp oil (olive or sunflower)

filling
1/3 cup chick peas / besan flour
1tbsp red chilli powder
1/2 tbsp turmeric powder
3 tbsp lemon juice or 1 tbsp amchur powder
2-tbsp cumin+coriander powder (I use kuzhambu powder
1/2 tsp hing/asafoetida
2 tbsp oil
Salt to taste
1/2 tsp Goda masala (for that extra punch- you can skip it) 

Procedure
Wash and drip dry/ pat dry the bhindi and slit them vertically; keep aside
Make the filling - mix in all the ingredients and stuff the okra 
prepare the tempering - in a kadai/pan pour 1 tbsp oil and put in crushed garlic, jeera (cumin) and hing and gently place the okra and fold in to coat the okra with the oil
Take the mixed in and tempered okra and place them on a baking tray
Bake your yummy okra for 25 -30 minutes at 350F/180 C (middle rack)

Pull the tray out of the oven and garnish with cilantro/coriander leaves and Voila!!

Works well with mooru kuzhambu and rice! or with plain roti and dal as well. Of course, my hubby has it as a snack :P... 

Trivia
I also use ragi /millet powder instead of besan
If you were to cook it on the stove and skip the oven, then just make sure you cook it on low to medium heat and never cover the dish. Covering leaves the dish limp (steam does its job!!)
Oven Roasted dishes consume less oil, hence the recipe!
Tried serving them as starters too and they were a hit
Garlic and hing/asafoetida are to balance the hard to digest chickpeas flour


Any variation to the recipe are all welcome...never hurts to learn :)

Tuesday, September 6, 2011

Eggless Banana Chocolate Bread

Pillayaar Chathurthi meant, we bought a whole load of fruits. For just tw of us its definitely too much :).


Extra bananas promptly turned into Low Fat Eggless Banana bread. This is an easy bake recipe. you could substitute the whole wheat flour with all purpose as well.

What you need : makes 15 (1/2") slices

1 cup mashed bananas - (it took me three ripe ones)
1 1/4 Cup whole wheat flour
1/3 cup yogurt or 1/4 cup butter milk (optional / substitute with 1/4 cup warm water)
2 - 3tbsp olive oil
3/4 tsp baking soda
1 tsp baking powder
1/4 tsp salt (optional)
3/4 cup light brown sugar
1 tsp Elaichi (cardamom) powder
1 tbsp unsweetened Chocolate powder (any baking choc powder is fine)
2 tbsp water (as needed) (skip this if you use butter milk)

What you need to do
Preheat your oven @350F/180C
In a mixing bowl, mix in the flour, baking soda, salt, sugar, cardamom powder, chocolate powder
Add yogurt/butter milk and mashed banana to the dry mix and fold well. 
Add olive oil, and water to bring it to a cake batter (dosa/idli batter) consistency
Bake for 35-40 minutes in the middle rack @350F or 180C
Do the fork test. Extend the bake time by another five minutes if needed

Want to see how  mine turned out this time


Wednesday, August 31, 2011

Patra anyone :)

I make these when possible. This batch was special because the leaves grew in my tiny balcony garden


patra

Friday, July 22, 2011

Guest Post ~ Lakshmi's Pumpkin Roti & Beetroot Dry Curry ~ You are invited!!

I bring to you a very yummy dinner menu from Lakshmi's Kitchen. We meet a few people in our life, with whom we seem to connect so well, and it feels like you have known them for ever. Lakshmi is one such person for me. After persistent efforts, I could get her to send in a recipe with a pic for my recipe box a.k.a. The food blog-avial n rasam :)

Here is what she sent me...:)

Pumpkin Chapathi
Ingredients:
•1 medium-sized cooked, peeled and well mashed yello pumpkin
•2 tsps coriander powder
•1 tsp cumin powder
•1/2 tsp cumin seeds
•1/2 tsp turmeric
•1 tsp olive oil
•Salt to taste
•3 tbsps finely chopped coriander leaves
•2" piece of fresh ginger grated fine
•4 cups whole-wheat flour
•Water to mix (1/3 cup of water)
Method
•Mix all ingerdients (mashed pumpkin, coriander and cumin powders, cumin seeds, turmeric,  salt to taste, chopped fresh coriander and grated ginger) into a large mixing bowl.
•Add the wheat flour, oil to all the ingredients (except the water) and prepare a dough of the mixture.Mix together very well
•Now slowly add water, a little at a time and knead well to make a smooth dough, Cover and set aside for an hour.
•Divide the dough into golf ball-sized portions and roll between your hands till they are smooth and without cracks.
•Very lightly flour a rolling board  and roll each ball into a round or triangle shaped piece. I always prefer to add more olive oil when I roll my chapathi


Beet Dry Curry
Beetroot(I used 4 medium)
Salt to taste
pepper powder - 4tablespoons
Diced Tomatoes - 1 cup
Diced Onions - 1 cup
Seasoning:
Channa Dal - 1 tsp
Urad Dal - 1 tsp
Curry leaves a few
Slit Green Chilli - 4
Oil - 1 tsp( I use Extra-Light olive oil)
Mustard- 1 tsp
Cumin - 1 tsp
Asafoetida - a pinch
Cloves 2
Cinnamon 1tsp
Fennel Seed 2tsp
Method
  •  Pressure cook  Whole Beets  till soft
  •  Peel the skin and chop, then Grate the Beet root
  •  Chopping beetroot is really tough before Cooking( I prefer to pressure cook it first)
  •  If you do not like to cook it with the skin on, you can quickly remove the skin and cook the whole beets.
  • Heat oil, add all seasoning ingredients , When the mustard pops, add the curry leaves and chopped beetroot.
  • Fry together and cook with a low-fire for 10 minutes
  • Finally add Diced tomatoes and Onions together and cook it for 3 minutes. I do not cook tomatoes and onion too much for this dry curry. I like the fresh onion smell in my curry.
Yummy!

Thursday, June 30, 2011

Guest Post ~ Aparna's Bread Baskets for Pot Luck!!

Aparna is one of my super cool buddies from my days in mumbai....we joined Global Trust bank together and were roomies while in mumbai..being in our early 20's was just one of the best things of those days!! As I have mentioned time and again, my food blog is my journal to document recipes, ideas from kitchens around me...I asked her to send in a guest post for the food blog...and here is a very yummy appetizer from her kitchen.

over to appu!

When we were little girls, my elder sister used to make bread toast. Even after all these years I remember the taste so fondly. So when one of my friends tried the vegetable bread Baskets from here, I wanted to try too.

I made about 60 bread baskets for a potluck party at a friends' place. Everyone liked them a lot and not one was leftover....

To make 12 bread baskets all you need is:


  1. 12 Bread slices
  2. 2 capsicums 
  3. 1 onion
  4. 1 tsp Mixed Italian herbs
  5. Salt and Balck Pepper to taste
  6. 1 bunch fresh corriander
  7. 2 jalapeno peppers
  8. 2 tsp lemon juice
  9. handful of peanuts
  10. tomato ketchup
  11. shredded cheese
How its made!!
  • Cut and remove the brown edges of the bread slices. Place each white slice in the muffin cup (spray the muffin cup with cooking oil or apply butter). Try not to break the slice and place it in such a way that it takes the shape of a cup.
  • Preheat the oven a 325 degrees. Bake these slices for about 15 min. 
  • Meanwhile, cut the onions and capsicum into small pieces and saute them in little oil. Add mixed Italian herbs, salt and pepper to taste. 
  • Cool the bread baskets. To make the green chutney, grind peanuts, corriander, jalapenos with little water. Add lemon juice and salt to taste. 
  • Spread this green chutney in each bread basket, put a spoonful of capsicum/onion curry in the basket. On top of the curry put some Tomato Ketchup and some shredded cheese in that order. 
  • Place them back in the oven and bake them until the cheese melts(it should take 5-7 min approx depending on the type of cheese used). Check once in between. Make sure the edges of the slices don't get burnt.
  • Serve it after cooling.


I used 3 colours of capsicum to make the presentation more colourful. You can make your own filling with your favourite vegetables.

---------
Thanks appu for the write up and wonderful pics...super yum!!!

Thursday, May 12, 2011

Guest Post ~ Anu Gummaraju's Picnic Menu

Please welcome back Anu Gummaraju of Scatter the batter. You saw her wonderful kitchen in my previous Heart(h) and Home post. She is among the most enterprising and enthusiastic momz I know. I am glad she responded to my request for a guest post. I like her ideas and simple tips to make even a simple breakfast real hit!!. For the guest post, she sent in her cool tips and ideas. I loved her write up..I am sure you will too :)


Over to you Anu....
------


For some, it means mangoes. Nimbu paani (fressssssshhhhh lime juice) to others. Iced lollies to kids (to me too, matter of fact). Sliced cucumbers sprinkled with salt and chilli powder to still others. Tall cool glasses of iced tea or chaas (flavoured, spiced buttermilk).. well, you get the drift, it's summer time!


Hi,  this is Anu from Scatter the Batter, very sheepishly writing this guest post for Sudha, who's the most patient blogger friend I have . I connected with Sudha over, what else, food! And I was amazed at the other passions that Sudha has and is so committed to. Her green crusade is inspiring. Her design blog manna for the design-soul.  Took me a while to get this down for Avial and Rasam, but I do hope you enjoy it.


I thought and thought about what to write and then said, why not a full fun menu for a summer picnic? We just had one today and it's cool to be sharing some of what we enjoyed picnic-ing on today.


No fun in the sun is complete without ice candy! In fact, it's great to start a picnic with this. Gets the kids in a happy mood. I'd found just the ideal popsicle makers at Howards Storage in Bangalore. The straws are great for slurping up all the melted candy juice. 


Decided to make double flavored candy for double the fun! Poured in litchi juice up to half the level of the Popsicle holders. Froze that. Chilled watermelon juice and poured that over the frozen litchi. Then stuck the sticks in. Froze again. (Tried semi-freezing the litchi first, but this didn't work. When I poured in the watermelon, the litchi part just came floating up, coz it wasn't firmly frozen I guess!) 


Try some fun combinations with contrasting colours like orange and purple grape, litchi and cola.. you get the idea!

For a quick starter, try a light egg scramble on french bread. Saute some onions, add salt and spice according to your taste, then add the eggs and scramble. Finish off with chopped coriander. Keep the french bread ready and sliced, top with the scramble and watch the kids scramble to get their hands on it!

Salads are great starters for a picnic too. Chunks of cucumber and tomatoes - any cool summery veggie you can think of will be great! Use chilled yogurt mixed with a mild spice like a dash of paprika or pepper for the dressing.

Pasta tossed in olive oil, chilli flakes and crushed garlic make a great main course, Also pasta with a mild tomato sauce. I find that loading a picnic basket with cheesy eats makes everyone go off to sleep right after that course on the mats...leaving the rest of the spread badly neglected. It's nice to keep it light!

A dessert of flavored yogurt again would go really well. But we had instant chocolate mousse! You can find the recipe here (http://scatterthebatter.com/2010/07/25/instant-chocolate-mousse/).

The temps did reach the high 30s methinks (C, not F!), but we kept our cool with all the coolness that comes from a perfectly planned picnic basket! Here's to a great summer to ya'll!
And thank you Sudha, for this awesome opportunity to chat with your readers :).

:)
Anu
http://scatterthebatter.com


--
Thank you for the lovely post Anu. I am sure the picnic was wonderful :). I am glad you shared your recipes on Avial and Rasam

Friday, April 15, 2011

Coconut (Thenga) Thuvayal

Thuvayal is a roasted variant of coconut chutney. Telugus call it kobbari pacchadi. This my amma's recipe (Not sure if i went ahaed and made changes unknowingly). I prefer mildly spicy food. Red chillies may be added or reduced depending on spice levels. This is a simple thuvayal and and nothing complicated about the recipe :)

Coconut thuvayal serves 4

Ingredients
Raw coconut - shredded 1 cup
red chilies - 2 or 3
Hing-1 pinch
Salt to suit your taste
chana dal - 1 tsp
moong dal- 1 tsp
urad dal-1tsp
Jeera - 1/2 tsp
tamarind - 2 small strips (can vary the amount as per requirement)
haldi - 1 pinch
mustard seeds - 1/4 tsp
Curry leaves


Process:
Dry roast coconut shreds in a kadai (medium flame). Transfer it to a plate to cool when you see it change to nice golden brown colour
Roasting coconut leaves a thin oily layer in the kadai, now roast mustard seeds, and dals
Add red chillies and hing jeera and haldi take it on to a separate plate to cool.
Grind all the ingredients together along with the tamarind and salt


will be back with a pic soon :)

LinkWithin

Related Posts with Thumbnails